Choosing podcast video equipment is a workflow decision, not just a camera purchase. Your speaker count determines the number of microphones and headphone outputs. Your room affects lighting and microphone placement. Your publishing schedule determines how much storage, power, and backup capacity you need.
This guide focuses on physical video-production gear for a small business studio. It does not cover AI clipping, transcription, or editing platforms. The goal is a setup that can be assembled, operated, checked, and reset consistently for every episode.
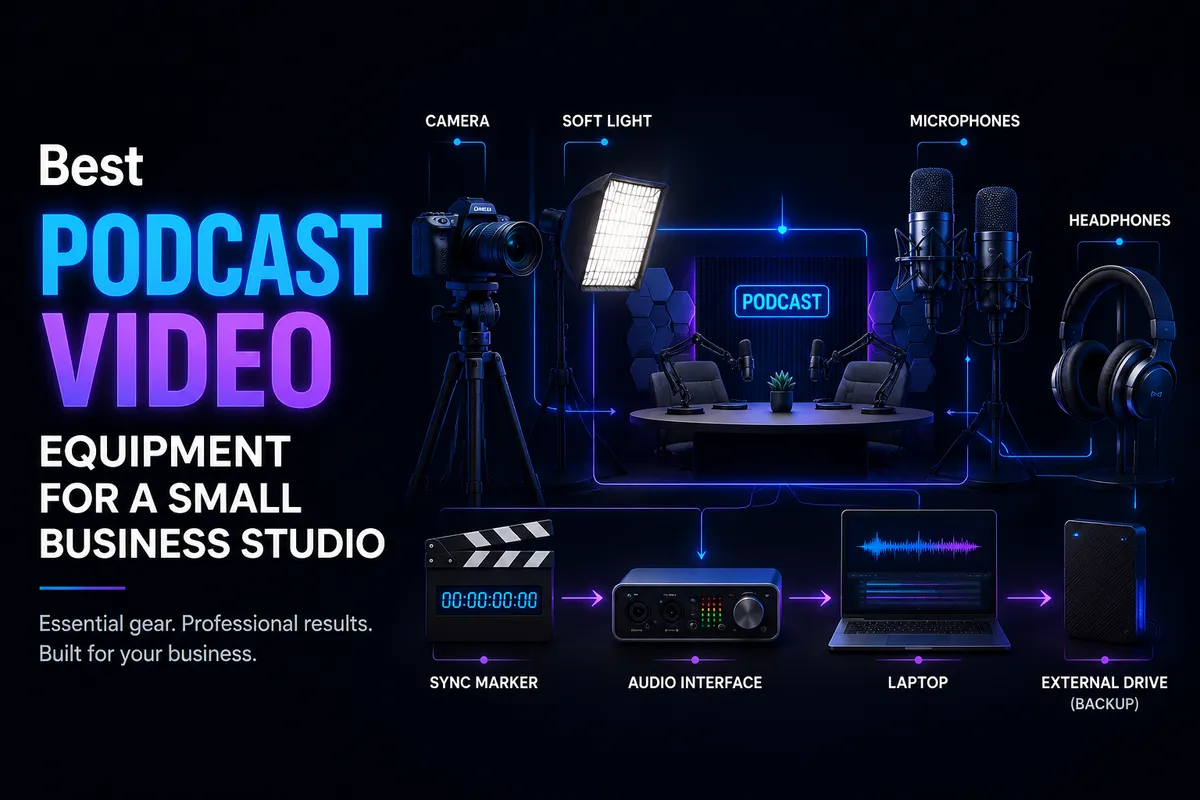
1. Decide the video format and number of speakers first
Define the show before comparing products. A solo desk show, a two-person interview, a product demonstration, and a remote guest episode have different equipment requirements.
- Solo desk show: One camera, one microphone, one key light, headphones, and a compact background may be enough.
- Two-person conversation: Plan for two microphones, two monitoring paths, wider framing, and lighting that covers both faces.
- Three or more people: Expect additional camera angles, more microphone inputs, more headphone outputs, and a clearer recording-control method.
- Remote interview: Each local participant still needs dependable local audio and video. A video-call recording should not be your only copy.
- Product demonstration: Add a top-down camera, tabletop mount, or secondary angle if viewers need to see objects clearly.
Speaker count affects the entire chain: interface inputs, headphone outputs, cable lengths, field of view, lighting spread, file size, and synchronization. Buy for the format you publish now, but leave one practical expansion path if guests or co-hosts are likely.
2. Camera options for desk, studio, and remote setups
Desk setup: webcam or compact camera
A quality webcam can be the most repeatable choice for a fixed desk. It starts quickly, works with common recording applications, and is easy to mount at eye level. Prioritize dependable exposure, a field of view that fits the desk, manual framing controls when available, and a mount that will not sag during a long recording.
A compact or interchangeable-lens camera can provide more control over perspective, background separation, and color. It also adds decisions about power, memory cards, capture hardware, focus, and heat. For a small business, the best camera is the one the team can operate correctly without a dedicated camera technician.
Studio setup: mirrorless camera or camcorder
Use an interchangeable-lens camera when visual identity, lens choice, and depth of field are important. A camcorder-style camera may be attractive for long-form recording because it emphasizes continuous operation, integrated zoom, and straightforward controls.
Before buying, check the specific model’s manual for continuous-recording limits, clean HDMI or USB output, autofocus behavior, power options, memory-card requirements, and heat-management guidance. Sony explains that continuous recording limits are model-specific and that a camera may stop recording after a high-temperature warning. Read the Sony guidance on continuous recording and overheating before planning a long interview around a particular camera.
A flip-out screen is useful when the host must verify framing without leaving the chair. Continuous power, a tested card, and a stable tripod can matter more to a business workflow than a small increase in resolution.
Remote setup: prioritize consistency
For remote contributors, an eye-level webcam or simple camera is usually more useful than a complicated cinema rig. Ask guests to place the lens near the top of the display, clean the lens, face a light source, and create some distance from the background.
When quality matters, record local camera and audio files from each participant rather than relying only on the compressed call recording. This adds file-management work, but it gives the production team a stronger source when the connection drops frames or introduces compression.
3. Lighting essentials
Lighting is among the highest-impact parts of podcast video equipment. It gives the camera consistent information to reproduce faces, clothing, and background detail. Overhead household lighting can create eye shadows and mixed color casts.
Start with a large, soft key light slightly to one side of the primary speaker and above eye level. A diffused LED panel or softbox is easier to control than a small bare light. Add a reflector or fill light if the shadow side becomes too dark.
- Key light: Establishes the main exposure and shapes the face.
- Fill or bounce: Reduces harsh contrast without removing all dimensionality.
- Background light: Adds separation and visual structure.
- Diffusion: Makes a small source appear larger and softens shadows.
- Color consistency: Prevents daylight, lamps, and LEDs from producing competing skin tones.
Ring lights can suit a solo host facing the lens. For two people, a broader off-camera source usually provides more flexible coverage and fewer circular reflections in glasses. Keep the background brighter or more colorful only when it does not overpower the speakers’ faces.
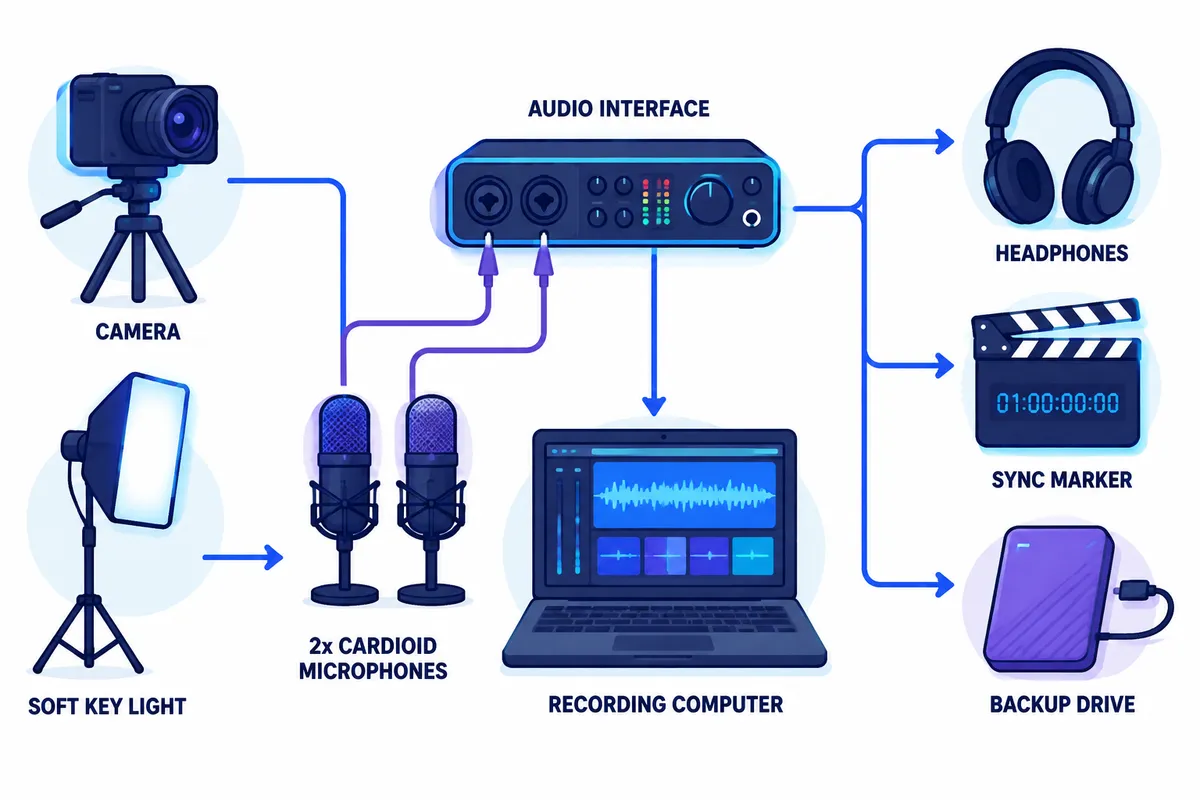
4. Microphones and audio interfaces
Viewers are generally less forgiving of unintelligible speech than an ordinary camera image. In a small or untreated room, a close-positioned dynamic microphone can be a practical starting point because it reduces the amount of distant room sound reaching the capsule. Shure recommends speaking about 3–6 inches from a dynamic microphone, using a quiet soft-furnished space, monitoring with closed-back headphones, running a short test, and avoiding clipping in its podcast recording guidance.
USB microphones
USB microphones are convenient for solo hosts and simple desk setups. Useful features include a headphone output, physical mute or volume controls, a stable mount, and a pickup pattern suited to one speaker.
Several USB microphones can become difficult to manage when two or more people need independent tracks. Operating-system routing, inconsistent device recognition, and limited expansion can create more troubleshooting than the low initial equipment count suggests.
XLR microphones and interfaces
XLR microphones connect to an audio interface, mixer, or podcast console. This adds hardware but makes multi-person recording, gain control, headphone monitoring, and future expansion easier to organize. RØDE’s podcast equipment overview presents microphones, studio arms, headphones, and production consoles as parts of one connected system, which supports planning the audio chain together rather than buying isolated components. See the RØDE professional podcast equipment overview.
A two-person studio should have:
- At least two microphone inputs with sufficient gain for the selected microphones.
- Two dependable headphone monitoring paths, or a headphone distribution solution.
- Individual level controls for each speaker.
- Low-latency or direct monitoring.
- Separate tracks when you expect to edit interruptions or rebalance voices.
Do not choose only by the words “dynamic” or “condenser.” Room noise, microphone distance, acoustic reflections, and operator consistency matter more than the category label. For example, Shure lists the MV7+ with both USB-C and XLR outputs, making it a useful example of a microphone that can begin as a direct-computer setup and later connect to an interface. Check the manufacturer’s MV7+ connectivity specifications before treating any model as an upgrade path.
5. Stands, mounts, and cable management
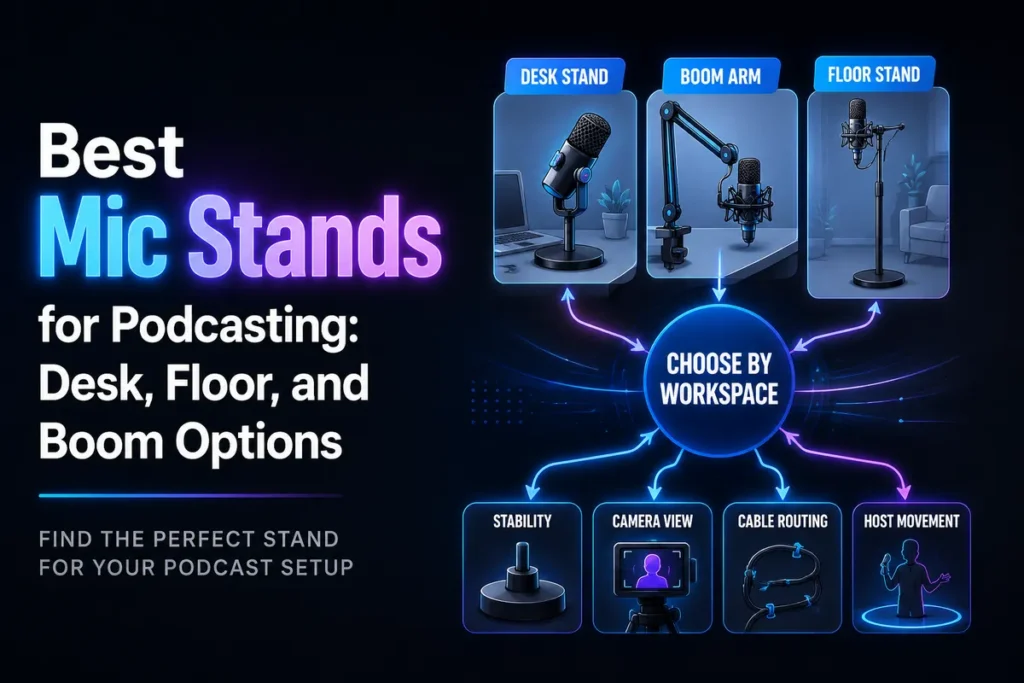
Stable accessories make the studio repeatable. Use a solid tripod, desk mount, or wall-supported arm for the camera. A microphone arm should hold its position when the speaker leans forward or adjusts notes.
Match the arm to the microphone’s weight, desk thickness, reach, and movement. A low-profile arm preserves desk space. An overhead boom can keep the tabletop clear but needs more clearance and careful cable routing.
Use hook-and-loop ties, cable sleeves, adhesive clips, and labels. Avoid tight bends near connectors, leave slack for ordinary movement, and keep power cables out of walking paths. Mark tripod feet, light stands, chair positions, and microphone-arm bases with removable tape so the set can be restored quickly.
6. Headphones and monitoring
Closed-back headphones help reveal hum, computer-fan noise, mouth clicks, clothing noise, echo, and clipping before the session ends. Shure’s recording guidance specifically recommends closed-back monitoring and a short test recording, making both useful checklist items for a small studio.
For two or more speakers, confirm that every participant can hear the recording source without creating an echo loop. As one concrete comparison point, Zoom’s PodTrak P4 documentation lists four XLR microphone inputs, four headphone outputs with individual volume controls, and separate-track recording. Those features illustrate what to compare when choosing an interface or podcast console; they are not requirements for every setup. See the Zoom PodTrak P4 specifications.
Monitor the actual recording source rather than relying only on the camera’s meter. If audio is recorded separately, clap once or use a clear synchronization cue at the beginning of the session. The cue creates a visible and audible alignment point; it does not replace a properly configured recording system.
7. Background and framing
Place the camera near eye level, leave modest headroom, and keep the eyes near the upper third of the frame. When possible, move the speaker away from the wall to create depth and reduce distracting shadows.
A wider lens can fit a small room but may exaggerate nearby objects and reveal clutter. A longer lens can create a more focused composition but needs more distance. Choose the field of view after placing the subject and microphone, not before.
Build the background around the business and audience. Shelves, products, books, plants, artwork, or a clean color block can communicate context. Keep bright lights, logos, and text from competing with the face.
For two people, decide whether the show needs a shared two-shot, separate close-ups, or both. A shared shot is simpler; separate angles give the editor more options for questions, reactions, and interruptions. With multiple cameras, match white balance, frame rate, exposure, and picture profile before recording.
8. Storage and power planning
Video storage requirements increase when you record multiple cameras, high-bitrate formats, local remote files, or separate audio tracks. Create the storage plan before the first shoot.
- Camera media: Use cards approved for the camera’s format and keep a tested spare.
- Working drive: Reserve space for original video, audio, proxies, project files, and exports.
- Backup drive: Copy original files to a separate physical location before formatting cards.
- Archive: Decide how long to retain finished episodes, project files, graphics, and audio stems.
- File naming: Include date, episode number, speaker, and camera or audio source.
Use continuous power for cameras, lights, interfaces, and computers where practical. Keep charged batteries available as an emergency option, but avoid making battery swaps part of the normal workflow. Sony’s camera guidance also shows why long sessions should be planned around the specific model’s temperature and recording behavior rather than a generic runtime assumption.
A simple folder structure is 01_CAMERA, 02_AUDIO, 03_PROJECT, 04_GRAPHICS, and 05_EXPORTS. After recording, copy and open representative files before clearing the cards.
9. Starter, two-person, and upgrade paths
Starter solo setup
- One webcam or compact camera with a stable mount.
- One USB dynamic microphone with a stand or arm.
- One soft key light with brightness adjustment.
- Closed-back headphones.
- One working drive and one backup drive.
- Basic cable management and marked positions.
This path is appropriate when consistency matters more than cinematic flexibility. The first upgrade should usually address poor light, room reflections, microphone placement, or storage reliability before replacing a camera that is already sharp and properly exposed.
Two-person studio setup
- One wide camera, with an optional close-up camera.
- Two dynamic microphones on stable arms.
- Two-input interface or podcast console with separate monitoring.
- One broad key light plus fill or background control.
- Tripods, power supplies, cards, spare cables, and labels.
- Separate audio tracks for easier editing.
This is often the most practical small-business configuration: it improves coverage and audio control without requiring a full control room. If you expect more than two speakers, choose an interface or console with spare inputs and enough headphone outputs instead of rebuilding the system immediately.
Upgrade path
- Add a second or third camera for reactions, close-ups, or product angles.
- Move to a multi-input interface or integrated production console.
- Add controlled background lighting and acoustic treatment.
- Use redundant recording media or a second audio recorder for high-value interviews.
- Document the setup with a diagram and operator checklist.
Improve reliability before complexity. An additional camera helps only when the team can match settings, start every device, and organize the files afterward.
10. Pre-shoot checklist
A checklist is the most valuable non-electronic piece of podcast video equipment. Keep it beside the recording position.
Room and framing
- Remove clutter and distracting reflections.
- Place subjects far enough from the background for separation.
- Set camera height, field of view, white balance, frame rate, and exposure.
- Confirm that hands, products, notes, and entrances remain in frame.
Lighting
- Control competing overhead lights.
- Check shadows on faces and the background.
- Check glasses, screens, and glossy products for reflections.
Audio
- Connect every microphone to the correct input.
- Keep microphones close and consistently positioned.
- Listen for hum, echo, clothing noise, and computer audio.
- Record a short test and check for clipping, silence, and delay.
Recording and backup
- Insert formatted cards with sufficient free space.
- Connect continuous power or confirm battery capacity.
- Verify that every camera and recorder is actually recording.
- Use a verbal slate or hand clap for synchronization.
- Copy and verify files before clearing cards.
How should a small business spend its equipment budget?
Prioritize the parts that protect every episode: microphone technique, lighting, stable mounts, monitoring, storage, and power. Upgrade the camera after you can clearly identify what the current camera cannot do. A darker image caused by weak lighting or a distracting image caused by poor framing will not automatically improve with a more expensive camera body.
Keep recording gear separate from post-production tools. Once files are safely captured, use this guide to turn podcast episodes into blog posts or review how to build a repeatable podcast workflow. For finishing, a podcast loudness analyzer can be added to the audio-quality process, while the RSS feed error guide is useful when the completed episode is ready for distribution.
Final buying advice
The best podcast video equipment for a small business studio is a dependable chain from framing to backup. Choose a camera that can cover the full session, light faces before chasing cinematic settings, give every speaker an independent and monitorable audio path, and protect originals with a clear storage routine.
Then make the setup repeatable. Mark stand positions, label cables, keep spare media available, and use the same test every time. That discipline will usually improve the finished show more than adding another specification to the shopping list.