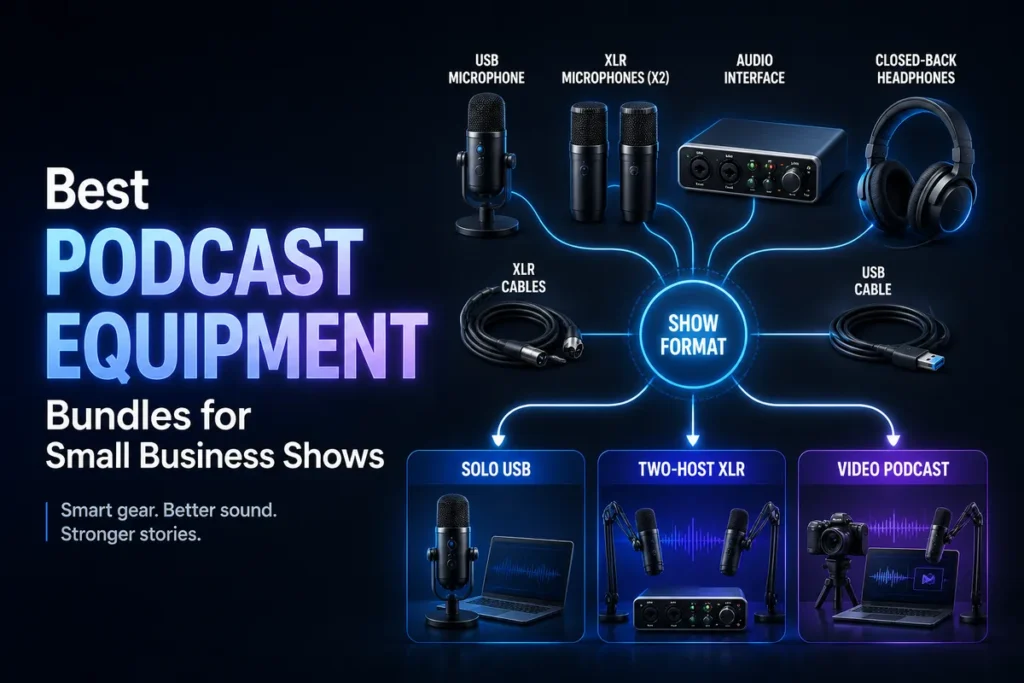
The best podcast equipment is the equipment that matches your recording format, room, speaker count, video plans, and production habits. A solo consultant recording in a quiet office needs a much simpler system than a four-person interview show in a conference room.
This buying guide organizes your decision around those practical differences. You will learn what a podcast actually needs, when USB or XLR makes sense, how to choose equipment for difficult rooms, which bundles are worth considering, and what to upgrade first as your business podcast grows.
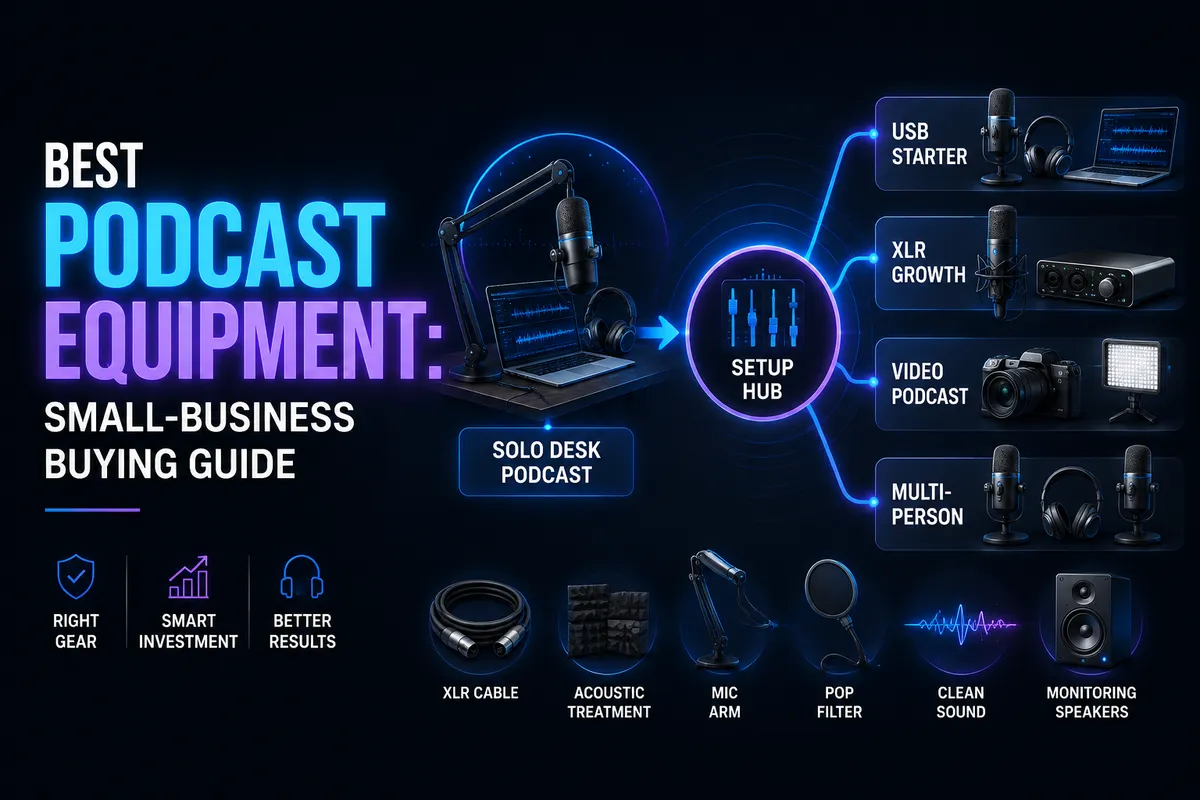
1. Fast recommendations by podcast type
Choose the recording scenario before choosing individual products. The format determines how many microphone inputs you need, how much room noise your microphones may capture, and whether portability or expandability matters most.
| Podcast type | Recommended starting setup | Why it works |
|---|---|---|
| Solo desk podcast | Dynamic USB microphone, boom arm, wired headphones | Simple connection and low setup friction |
| Solo video podcast | USB or hybrid USB/XLR microphone, camera, key light, headphones | Keeps audio manageable while adding video |
| Remote interviews | Dynamic USB microphone, wired headphones, remote recording platform | Each participant can capture better audio locally |
| Two-person in-person show | Two dynamic XLR microphones, two-input interface or podcast mixer, two headphones | Separate channels make levels and editing easier |
| Three- or four-person show | Three or four microphones, matching preamp inputs, headphone distribution | Prevents input shortages and improvised adapters |
| Mobile interviews | Portable recorder or wireless microphone system, windscreens, spare power | Built for changing locations and unpredictable rooms |
A practical beginner path is a USB microphone, wired headphones, and basic editing software. Buzzsprout’s podcast equipment guide recommends this type of low-complexity starting point. Treat it as a decision principle rather than a reason to buy a specific brand: begin with the smallest reliable system that supports your format.
2. What equipment does a podcast actually need?
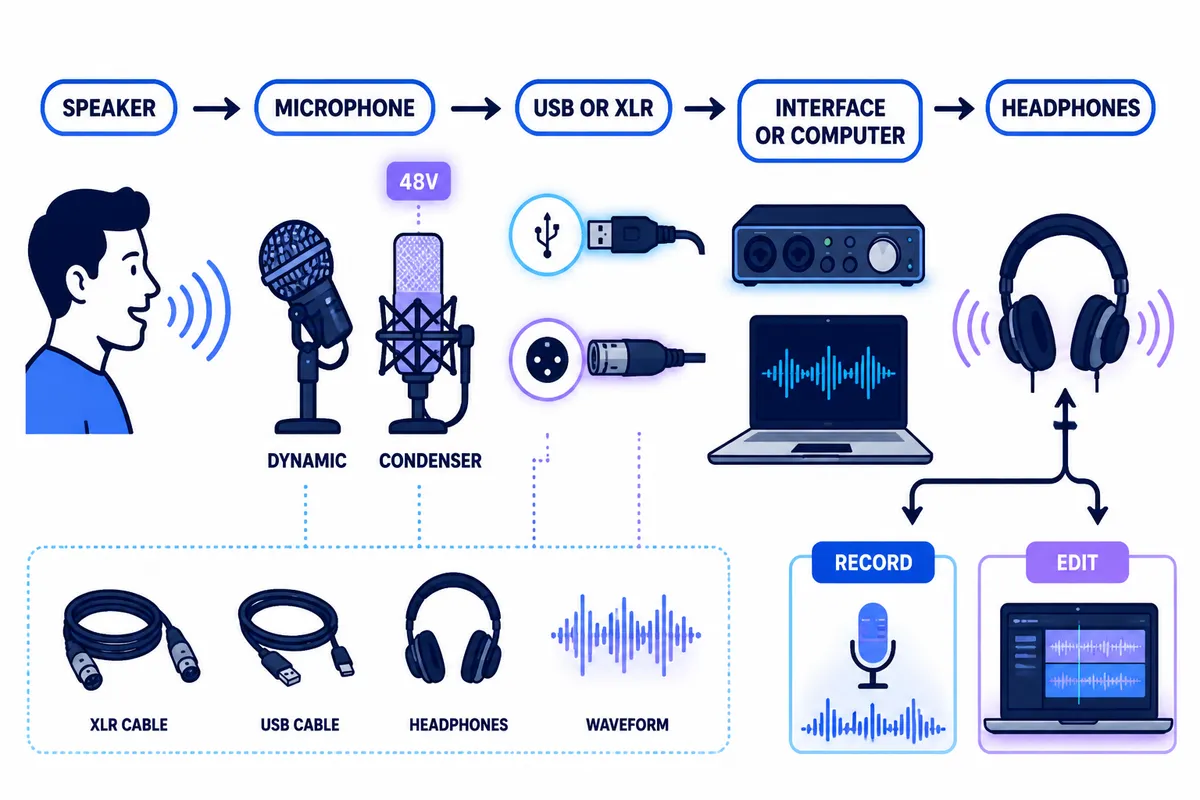
A basic podcast recording chain has five jobs:
- Capture speech: A microphone converts your voice into an audio signal.
- Connect the microphone: USB microphones connect directly to a compatible computer or device. XLR microphones need an interface, mixer, recorder, or other microphone preamp.
- Monitor the recording: Headphones help you detect hiss, hum, distortion, echo, plosives, and connection problems.
- Hold the microphone: A stand or arm keeps microphone distance consistent.
- Record and edit: A computer, tablet, phone, recorder, or remote recording service stores the audio for production.
Most beginners do not need a hardware compressor, studio monitor speakers, premium acoustic panels, or a dedicated mixer. Those items solve specific problems. If the room is noisy, microphone placement and a suitable dynamic microphone may help more than a more expensive preamp. If four people will speak at once, additional inputs matter more than a premium solo microphone.
3. Microphones: USB, XLR, condenser, and dynamic
USB microphones: the simplest path
A USB microphone includes the conversion hardware needed to send audio to a computer or other compatible device. That makes USB a practical choice for solo hosts, first-time creators, and businesses that want to start recording without learning an audio interface.
USB is especially useful when you:
- Record one person at a time.
- Want a compact desk setup.
- Move between home and office locations.
- Are testing the podcast concept before investing in a larger system.
Some USB microphones also include a headphone output for direct monitoring. For example, the RØDE PodMic USB specifications list both USB-C and XLR connectivity and a headphone output. That combination creates a useful upgrade path: start over USB, then move to an interface later if the show becomes more complex.
XLR microphones: more components, more flexibility
XLR microphones use a professional three-pin connection. An XLR microphone normally cannot connect directly to a computer with only an XLR cable; it needs a compatible interface, mixer, recorder, or other preamp. RØDE’s XLR connection instructions show why an additional device is required.
XLR becomes the better fit when you need:
- Two or more microphones recorded on separate channels.
- Physical gain controls and headphone monitoring.
- The freedom to change microphones later.
- Routing for live streaming, cameras, callers, or sound effects.
- A system that can grow beyond a single desk recording.
The tradeoff is complexity. You must match the microphone, cable, interface, gain setting, monitoring path, and recording software.
Dynamic microphones: practical for imperfect rooms
Dynamic microphones are often a sensible choice for home offices, shared rooms, and business environments where background noise cannot be eliminated. They generally work best when the speaker stays close and maintains a consistent position.
Focusrite’s podcast-interface documentation specifically recommends dynamic microphones for speech because they can help reduce unwanted surrounding noise. Read the Vocaster Two microphone setup guidance for the manufacturer’s explanation.
Dynamic does not mean noise-proof. A dynamic microphone can still capture keyboard noise, HVAC systems, traffic, and reflections if it is too far away or pointed incorrectly. Plan to speak close to it—often a few inches away—and keep your mouth aligned with its pickup area.
Condenser microphones: detail for controlled spaces
Condenser microphones are often chosen for quiet, reasonably controlled rooms. Their sensitivity can produce a detailed voice sound, but it can also reveal computer fans, bare-wall reflections, chair movement, and distant traffic.
Many XLR condenser microphones require 48-volt phantom power. Focusrite’s phantom-power explanation states that condenser microphones require electrical power and that 48V is commonly delivered through the XLR cable. Check the microphone manual before enabling phantom power, particularly when using vintage ribbon microphones or mixed microphone types.
Which microphone type should a small-business owner buy?
Choose a dynamic USB microphone when simplicity is the priority. Choose a hybrid USB/XLR dynamic microphone when you want a simple start and a clear expansion path. Choose an XLR condenser microphone when the room is quiet, the sound you want justifies its sensitivity, and you are comfortable using an interface.
4. Interfaces, mixers, and microphone preamps
What does an audio interface do?
An audio interface connects microphones and other audio sources to a computer. It commonly provides microphone preamps, analog-to-digital conversion, headphone monitoring, and separate input channels. See Focusrite’s audio-interface overview for examples of how interfaces are organized by input and output capacity.
For a solo XLR setup, one microphone input may be enough. For two people, choose at least two microphone preamp inputs. For a four-person show, four independent inputs are the safer minimum. Count the speakers you realistically expect within the next six to twelve months, not only the people scheduled for the first episode.
When should you buy a mixer or podcast console?
A mixer or podcast production console makes sense when you need hands-on control, multiple microphones, remote callers, sound effects, live routing, or streaming. Some podcast-focused devices combine preamps, headphone outputs, monitoring, recording, and routing in one unit.
Do not buy a mixer solely because it looks professional. More controls create more configuration decisions. If you are one person recording into editing software, a USB microphone or compact interface may be faster and less error-prone.
Gain and phantom power
A preamp raises a microphone’s relatively quiet signal to a usable recording level. Set gain while speaking normally and leave room for louder words and laughter. If the gain is near maximum and the recording remains weak, check microphone distance, input selection, phantom-power requirements, and whether the interface provides sufficient gain.
Normal passive dynamic microphones do not require phantom power, while condenser microphones do. Some active dynamics and inline boosters may also require power. Focusrite warns that phantom power can damage certain unbalanced or vintage ribbon microphones, so verify compatibility before switching on 48V.
5. Headphones and monitoring
Choose closed-back, wired headphones for recording. They reduce the chance that playback leaks into the microphone, and the wired connection avoids Bluetooth latency and battery problems.
Look for:
- Comfort during sessions lasting 30 minutes or longer.
- A durable or replaceable cable.
- Enough detail to reveal hiss, hum, clicks, and uneven microphone distance.
- A connector compatible with your microphone, interface, or mixer.
- Enough headphone outputs for every person who needs to monitor.
Bluetooth headphones can work for casual listening after recording, but they are not ideal as the primary monitoring tool during a live conversation. Wireless processing may introduce delay and make timing harder to judge. When using an interface, connect headphones directly to it; Focusrite’s monitoring guidance explains why this is generally preferable to monitoring through the computer’s headphone port.
6. Mic stands, arms, and boom options
A stand is part of the sound chain because stable positioning helps maintain consistent volume and tone.
Desktop stands
Desktop stands are compact and portable. They work well when the microphone sits directly in front of you and the desk is sturdy. Their weakness is that tapping, typing, and desk movement can travel into the recording.
Boom arms
A boom arm keeps the microphone positioned while leaving space for notes, keyboards, and camera controls. Check its weight capacity, clamp depth, reach, thread size, and ability to fold away. Heavy broadcast microphones may need a stronger arm than small USB models.
Floor and table stands
Use a floor stand when a desk cannot support a clamp, guests need flexible positioning, or you record in rooms without a permanent workstation. A floor stand takes more space but can reduce desk vibration.
7. Cables, pop filters, shock mounts, and accessories
Buy accessories to solve identifiable problems rather than to make the setup look complete.
- XLR cables: One per XLR microphone, with enough length for comfortable positioning.
- Pop filter or windscreen: Helps reduce bursts of air from plosive sounds such as “P” and “B.”
- Shock mount: Can reduce some stand and desk vibrations, but cannot fix a noisy desk or careless handling.
- Headphone adapters: Useful when headphone and interface connectors differ.
- Spare cables: Reduce the risk of cancelling a scheduled interview over a low-cost failure.
- Cable management: Labeled cables and reusable ties make setup repeatable.
A correctly positioned pop filter can be more useful than an expensive cable. A shock mount cannot remove room echo, and acoustic treatment cannot compensate for a microphone pointed away from the speaker.
8. Podcast equipment bundles
Bundles are useful when they include components you would otherwise buy separately, such as microphones, stands, cables, headphones, or a multi-input production device. They can also reduce compatibility mistakes for first-time buyers.
RØDE’s podcast equipment kits show how bundles can be organized around individual creators, multiple speakers, and different production workflows. Use that structure as a comparison framework, not as proof that every included item is necessary.
Before buying a bundle, check:
- How many microphones and separate channels are included.
- Whether the microphones are USB, XLR, or hybrid.
- How many people can monitor through headphones.
- Whether stands fit your desk and microphone weight.
- Whether cables match every connector.
- Whether the package contains equipment you will not use.
- Whether the bundle supports your next realistic upgrade.
A bundle is valuable when it removes decisions without locking you into the wrong format. Do not pay for four microphones if you record alone and have no credible plan for group episodes.
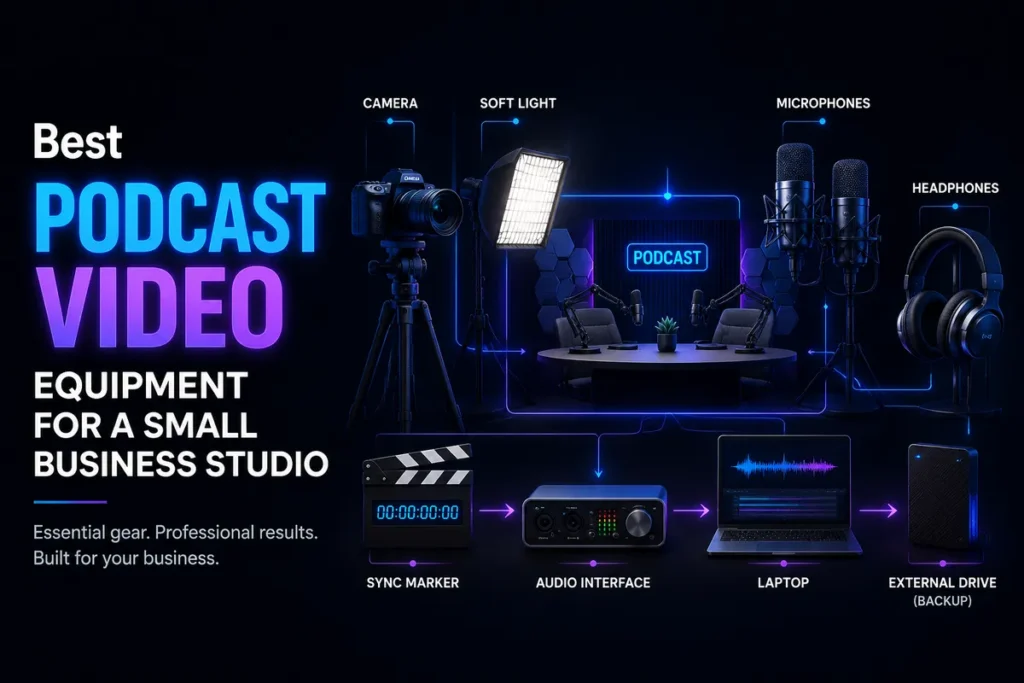
9. Video podcast equipment
Video adds cameras, lighting, storage, and editing demands, but audio remains the first priority. Viewers may tolerate an ordinary camera more easily than unintelligible or echo-filled speech.
A basic video podcast setup may include:
- A webcam, camera, or capable smartphone.
- A microphone positioned close to each speaker.
- A key light or soft front light.
- A tripod or stable camera mount.
- Headphones for setup and troubleshooting.
- Enough storage and processing power for video files.
For a solo desk show, a USB microphone and webcam may be enough to validate the format. For two or more in-person speakers, use separate microphones and a system that records each voice independently. A single camera microphone placed across a table usually captures more room sound and gives you less control during editing.
Compare audio routing carefully before buying a video kit. A package can look visually complete while still requiring an interface, headphone distribution, additional cables, or a way to send clean audio to the camera.
10. Room and desk considerations
Your room can affect perceived quality more than a modest difference between microphones. Hard walls, windows, floors, and tabletops create reflections that may sound echoey, boxy, or distant.
Improve the room before replacing the microphone
Use curtains, rugs, bookshelves, soft furniture, and occupied rooms to reduce strong reflections. Position the microphone away from bare walls and windows when possible. Avoid placing the speaker in the center of a large empty room.
If your podcast sounds muffled or underwater, the cause may be microphone placement, excessive processing, a damaged cable, a poor connection, or room reflections—not simply the microphone. Use Podtools’ guide to why a podcast sounds muffled to narrow down the issue, then review how to remove echo from audio for reflective-room problems.
Desk layout
Leave room for the arm, headphones, notes, water, and camera controls. Keep the microphone away from the keyboard when possible. If guests share the desk, make sure everyone can sit comfortably without bumping a stand or reaching across another microphone.
11. Starter, growing-business, and multi-person setups
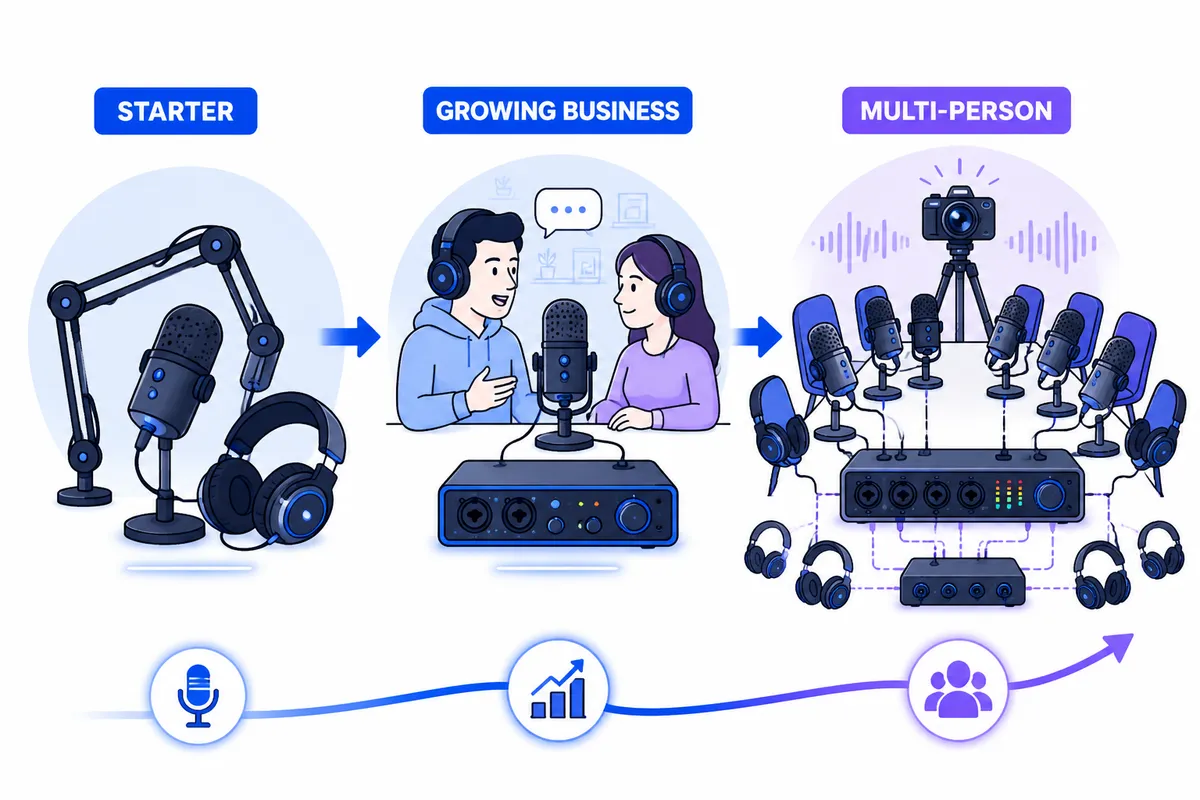
Starter setup
- One dynamic USB microphone.
- One stable desk stand or boom arm.
- One pair of wired closed-back headphones.
- A pop filter or built-in windscreen.
- A computer and recording or editing software.
This setup is best for validating an idea, recording solo episodes, and learning microphone technique. Keep the room, microphone distance, input level, and workflow consistent.
Growing-business setup
When the podcast becomes a regular marketing channel, consider a hybrid USB/XLR microphone or an XLR microphone with a two-input interface. Add a second microphone, second pair of headphones, second arm, and spare cables when guests become frequent.
The goal is not maximum equipment. It is reducing recurring production friction so every interview does not become a new technical project.
Multi-person setup
For three or four in-person speakers, count microphone inputs and headphone outputs first. Each speaker should have an appropriate microphone and, whenever possible, a separate recording channel.
A podcast mixer or production console may be worthwhile for live routing, remote callers, sound pads, or hands-on control. Otherwise, a multi-input interface and recording software may provide a simpler and more flexible workflow.
12. Compatibility and buying checklist
Before ordering, answer these questions:
- How many people will speak at the same time?
- Will you record at a desk, in a studio, or in changing locations?
- Is the room quiet, reflective, or shared with other activity?
- Does the microphone connect by USB, XLR, or both?
- If it is XLR, what device provides the preamp and computer connection?
- How many inputs will you need six to twelve months from now?
- How many people need headphone monitoring?
- Does the stand support the microphone’s weight?
- Are the computer, tablet, phone, and operating system compatible?
- Can you replace cables, stands, or headphones separately?
- What is your backup plan for a failed cable, battery, or recording device?
Compatibility is more than whether a plug physically fits. Confirm USB power needs, driver or operating-system requirements, phantom-power behavior, monitoring options, and whether your software can select the correct input channels.
13. Setup and testing workflow
- Assemble the physical setup: Secure the stand, connect the microphone, and route cables away from pull points.
- Set microphone position: Keep it close enough for a strong voice signal, but not so close that plosives dominate.
- Connect headphones: Monitor from the microphone, interface, or mixer using the lowest practical latency.
- Select the input: Confirm that the recording software is using the intended microphone or interface.
- Set gain while speaking normally: Leave headroom for louder words and laughter.
- Record a test: Capture speech, silence, chair movement, and a louder phrase.
- Listen back: Check for hum, echo, clicks, computer noise, plosives, uneven distance, and missing channels.
- Save a backup: Keep the test and final recording in a second location until the episode is safely edited and published.
Do not wait until the guest arrives to discover that a microphone is muted, a channel is missing, or headphones are connected to the wrong device. A short test is part of the equipment workflow.
After recording, match post-production tools to the job. Podtools’ guide to podcast editing software covers editing options, while its LUFS analyzer guide explains loudness checks. These post-production decisions should not force you to buy a more complicated microphone system than your recording format requires.
14. Upgrade priorities and common buying mistakes
Upgrade in this order
- Room and microphone technique: Improve placement, distance, and background noise first.
- Microphone: Upgrade when the current model limits clarity or does not suit the room.
- Monitoring: Add better or additional wired headphones if problems are being missed.
- Stands and accessories: Improve comfort, positioning, and repeatability.
- Interface or mixer: Add inputs, routing, or control when the format requires it.
- Video and lighting: Upgrade when video supports a measurable business goal.
- Processing and automation: Improve editing efficiency after the recording chain is reliable.
Common mistakes to avoid
- Buying without considering the room: A sensitive microphone can reveal reflections and background noise.
- Choosing a single-input system for two speakers: Separate channels are easier to edit and balance.
- Ignoring headphone monitoring: Problems caught during recording are cheaper to fix.
- Buying a mixer too early: More controls do not automatically create better sound.
- Using the microphone too far away: Distance increases the proportion of room sound.
- Spending on accessories before solving acoustics: A premium cable cannot repair echo.
- Buying for a hypothetical studio: Purchase for the show you can realistically produce now.
- Forgetting continuity: Keep spare cables, duplicate files, and a repeatable checklist.
Final buying advice
For most small-business owners, the best first podcast equipment is a dynamic USB microphone, wired headphones, a stable stand or arm, and reliable recording software. If regular guests are part of the plan, choose a hybrid USB/XLR microphone or begin with XLR microphones and a two-input interface.
Spend according to the problem you need to solve: more inputs for more speakers, better isolation for a noisy room, stronger stands for a permanent desk, and a mixer or production console only when routing or live control justifies it. This keeps the setup practical today while preserving a sensible upgrade path for tomorrow.