For founders and small teams, the advantage of an audio editor online free workflow is speed. You can handle a short interview, product update, or customer episode from a browser without installing a full desktop DAW or building a large project session.
The method below focuses on practical podcast cleanup: removing false starts, shortening accidental silence, smoothing obvious level differences, adding a simple intro or outro, and exporting a file you can check before publishing. It is not designed to replace a full production system for music-heavy shows, many-speaker edits, advanced restoration, or detailed automation.
When is a free online audio editor suitable?
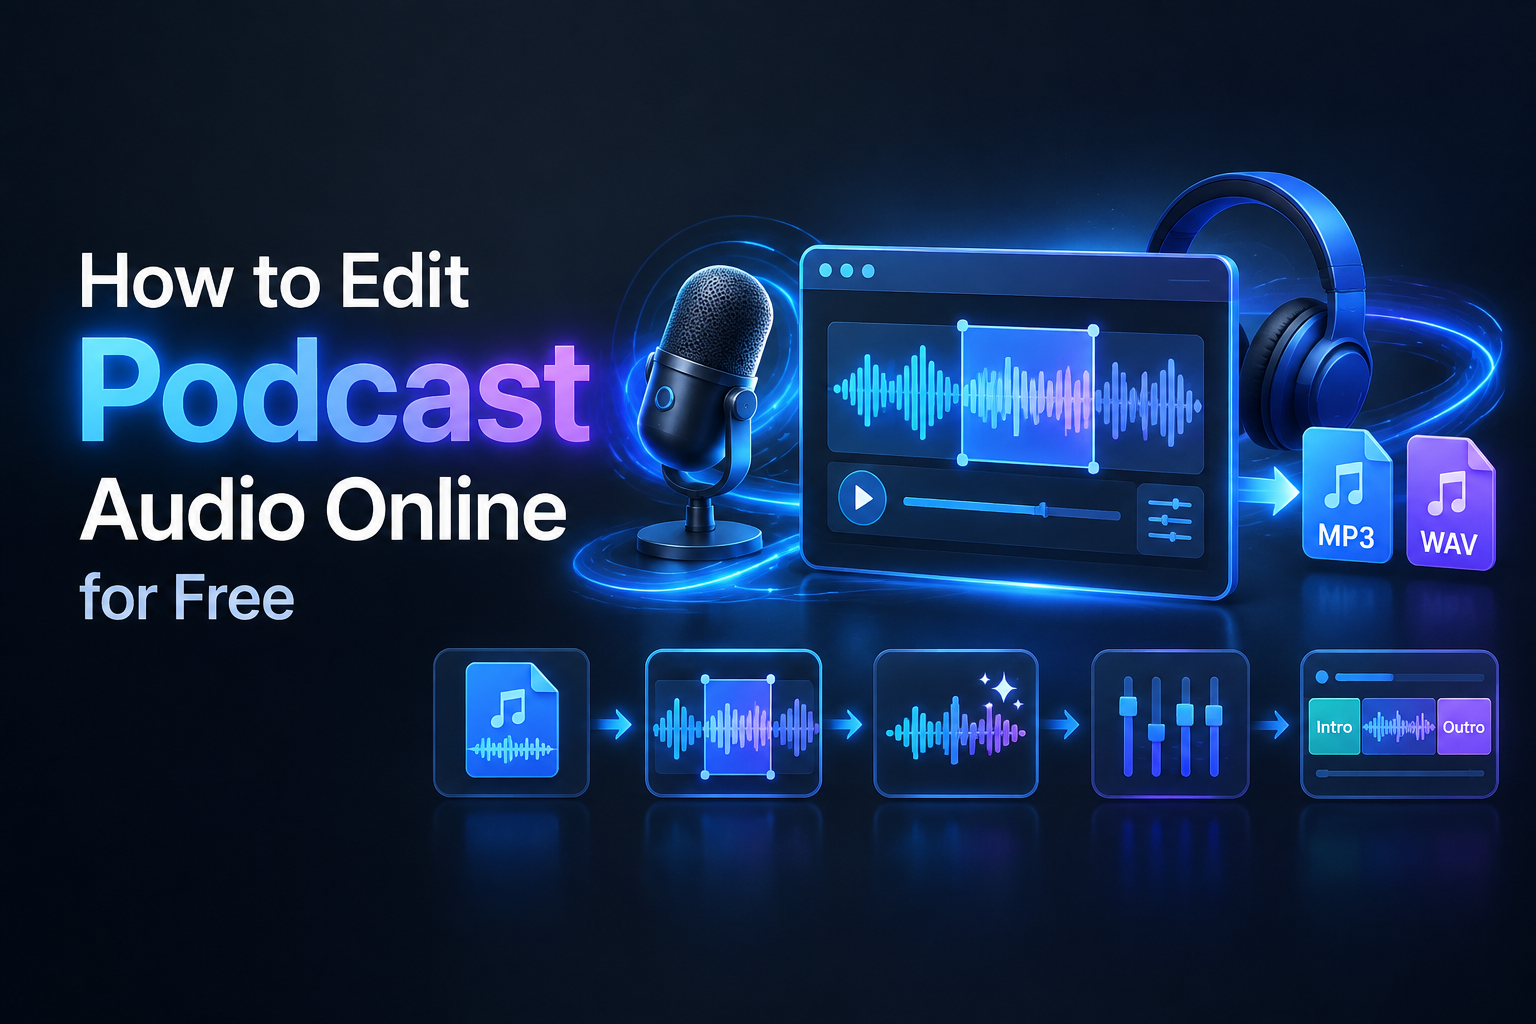
A browser editor is a good fit when the recording already exists and the changes are easy to identify. AudioMass describes itself as a free, open-source, web-based waveform editor that runs in the browser without a backend or plugins. Its documented tools include waveform navigation, cutting, trimming, volume changes, fades, effects, undo, and MP3 export. See the AudioMass feature and workflow documentation before choosing it for a specific project.
Use this lightweight route when you need to:
- Remove a false start, repeated sentence, cough, or long accidental pause.
- Trim silence from the beginning or end of an episode.
- Correct one noticeably quiet or loud section.
- Add a short intro or outro to an otherwise finished recording.
- Make a quick edit from a temporary workstation or laptop.
- Export a clean listening copy without maintaining a large desktop session.
Choose a desktop editor instead when you need numerous speaker tracks, detailed automation, complex music placement, extensive restoration, or a long-term editable project archive. A browser tab may also be less comfortable for very long, high-resolution recordings because memory use and browser stability can become limiting factors.
Editing is not recording or loudness analysis
Recording captures the voice. Editing changes the captured file. Loudness analysis measures how the finished program behaves against a delivery target. Some tools include all three capabilities, but they are separate tasks.
If the source is distorted, consistently noisy, or badly positioned relative to the microphone, cutting the waveform will not repair the underlying recording. Evaluate the source first with Podtools’ mic quality test guide, then decide whether a quick edit is enough.
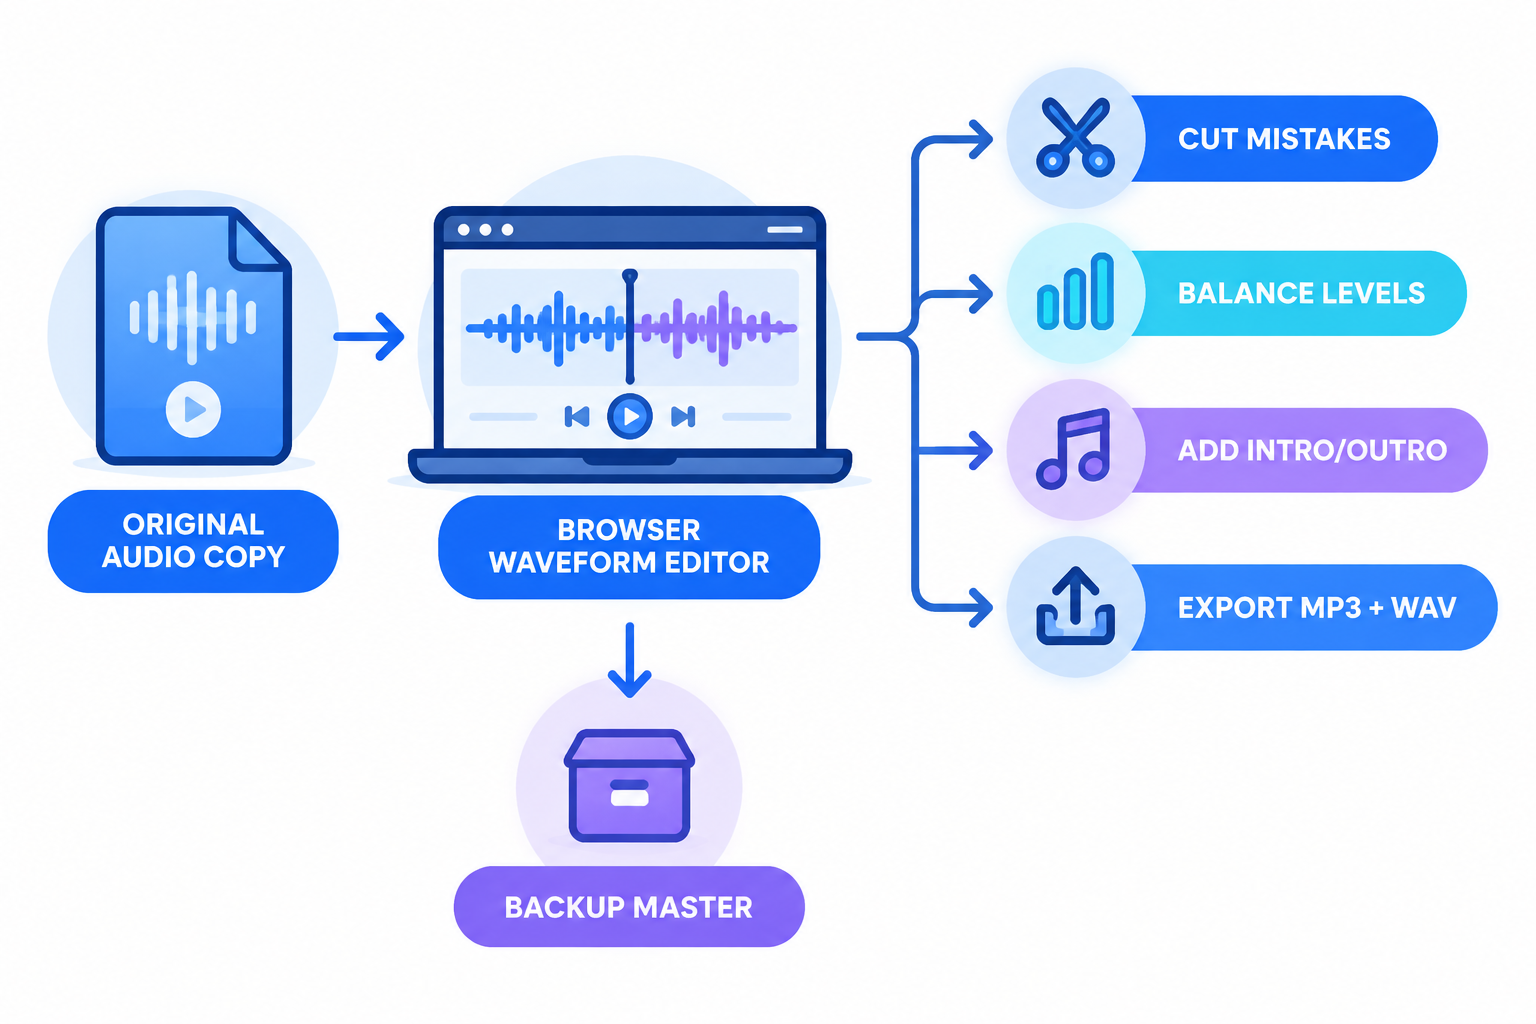
1. Make a copy before you import anything
Keep the original recording untouched. Create a working copy with a clear filename before opening the browser editor:
show-episode-12-original.wavshow-episode-12-edit-v1.wavshow-episode-12-final.mp3
This protects you from destructive edits, accidental overwrites, and exports that remove material you later decide to restore. For important episodes, retain the original, an editable or high-quality master, and the final delivery file.
2. Check the file and browser workflow
A browser application can access a file after you select it through a file picker or drag-and-drop action. The MDN File API guide explains that selected files are represented as File objects and can expose information such as the filename, size, and MIME type. That does not, by itself, tell you whether a particular editor uploads or stores the audio.
Before editing, confirm:
- Format: WAV and MP3 are common, but browser and editor support can vary.
- Duration: the full recording appears after import.
- Channels: determine whether the source is mono or stereo.
- Sample rate: avoid changing it unnecessarily during a simple cleanup.
- File size: large uncompressed files may take longer to load and use more browser memory.
- Waveform: listen if it appears extremely small, clipped, or incomplete.
If the file will not open, try a WAV copy or use a trusted local conversion tool. Do not repeatedly upload confidential interviews, customer calls, unreleased announcements, or internal material without checking the editor’s current privacy documentation.
3. Learn the waveform before cutting
A waveform shows amplitude over time. Larger shapes often correspond to louder material, while flatter areas often indicate quieter material. It is useful for locating likely pauses and edits, but it is not a transcript and should not be treated as a perfect representation of intelligibility.
Use this review sequence:
- Play the episode once without changing anything.
- Write down rough timestamps for obvious problems.
- Return to each timestamp and zoom in.
- Select slightly more audio than the problem itself.
- Cut or trim the selection.
- Play several seconds before and after the edit.
- Undo immediately if the transition sounds abrupt.
Start with obvious fixes before applying effects. This gives you a clean reference for judging whether later level changes actually improve the episode.
4. Cut pauses, mistakes, and false starts cleanly
For many founder-led podcasts, clean cutting creates more value than heavy processing. Remove repeated phrases, abandoned sentences, accidental starts, and gaps that clearly interrupt the conversation.
Do not remove every pause
Natural pauses help listeners process an idea and preserve the speaker’s rhythm. Focus on silence that feels accidental: a long wait after a remote guest finishes, a pause while searching for a word, or dead air caused by a restart.
After each cut, ask whether the speaker now sounds rushed or robotic. If so, restore part of the original pause. A polished edit should preserve the person’s delivery rather than make every gap identical.
Prevent clicks at edit points
A cut at an unfortunate waveform position can create a click or pop. AudioMass documents zero-crossing selection tools and short fades among its editing features, which can help you choose smoother edit points. Review the documented zero-crossing and fade tools for the current interface.
Listen for:
- A click or pop immediately at the cut.
- A missing consonant at the beginning or end of a word.
- A sudden change in room tone.
- A guest who sounds unnaturally rushed.
If the room has a steady background sound, aggressive silence removal can make the ambience disappear and return abruptly. Leave a small amount of room tone or use a short crossfade when the editor supports it.
5. Adjust levels without overprocessing
Make the smallest change that solves the problem. A quiet section may need gain; a loud section may need reduction. You do not automatically need compression, equalization, noise reduction, and normalization together.
- Select the unusually quiet or loud section.
- Apply a modest gain adjustment.
- Preview the transition into the surrounding speech.
- Compare it at a comfortable listening volume.
- Undo and try a smaller change if the edit becomes obvious.
Watch for clipping
Clipping occurs when the signal exceeds the available digital range. It can sound harsh or distorted. Turning down a clipped recording may reduce its volume, but it cannot reliably restore detail that was already distorted during capture.
If only one word is too loud, reduce that region rather than lowering the entire episode. If the whole source is distorted, treat it as a recording-quality problem.
Use noise reduction and compression cautiously
Light processing can help, but excessive noise reduction may make speech sound watery or metallic. Heavy compression can make breaths and room noise more prominent. Preview each major effect, apply one process at a time, and compare against the untreated backup.
Check the result with headphones and ordinary laptop speakers. Stop when the speech is clear and consistent—not when every waveform peak looks identical.
A waveform view also cannot confirm integrated loudness. If your hosting or distribution workflow specifies a loudness target, perform a separate loudness check after editing with an appropriate meter or delivery tool.
6. Add a simple intro and outro
Clean the spoken episode first. Then add the intro and outro so you can judge their balance against the finished voice track.
- Trim unwanted material from the episode’s opening and ending.
- Open or import the intro segment.
- Place it before the first spoken section.
- Place the outro after the final spoken section.
- Listen through every transition.
- Lower the music if it competes with the first or last spoken words.
Some browser editors are primarily waveform editors rather than full multitrack timelines. If positioning several clips becomes awkward, export the cleaned voice and use a more capable multitrack tool for a music-heavy arrangement. Do not force a complex production into a tool intended for quick edits.
For the broader production process, see Podtools’ guide to creating a podcast workflow with AI tools. The browser edit is the cleanup layer, not the entire podcast operation.
7. Export a master and a delivery file
Play the complete edited timeline before exporting. Check the beginning, a middle section, every transition, and the ending.
Keep a lossless or high-quality master
For later revisions, keep a WAV or another lossless/high-quality master when practical. The Audacity MP3 export documentation advises doing production work in a lossless format such as WAV, AIFF, or FLAC and exporting to MP3 only for final use.
Choose MP3 settings according to the show
MP3 is widely compatible, but there is no single setting for every podcast. Audacity’s current guidance describes CBR as a common podcast choice and notes that mono is usually preferred for voice-only programs, while stereo may be appropriate when the production uses meaningful left-right information. Its examples include 64 kbps mono for smaller voice files, 96 kbps mono for higher voice quality, and 128 kbps stereo where stereo is required. Treat these as reference options, then follow your host’s requirements.
- Use mono when the program is genuinely voice-only and the destination accepts it.
- Use stereo when music, ambience, or spatial placement makes it meaningful.
- Keep the sample rate consistent unless a destination requires a change.
- Use a clear versioned filename.
- Export the delivery file separately from the original and master.
Use the Podtools MP3 file size guide to estimate how duration, channel choice, and bitrate affect storage and upload size.
Check the exported file outside the editor
Open the exported file in a separate player and check the start, a random middle section, and the final minute. Confirm that:
- The file opens normally.
- The intro and outro are present.
- No selection-only or muted export occurred.
- The voice does not change unexpectedly after conversion.
- The duration is correct.
- The filename and metadata are suitable for your workflow.
If duration matters for publishing or scheduling, use an audio length checker after export rather than relying only on the browser timeline.
Privacy, browser limits, and backups
“Online” does not always mean “uploaded to a remote server.” AudioMass states that it runs locally in the browser without a backend and can continue working offline after loading. Other editors may use different architectures, so verify the specific tool’s current privacy policy before importing sensitive audio.
Browser editing can also be affected by:
- Available memory and processor capacity.
- Large files and long loading times.
- Browser crashes or accidental tab closure.
- Unsupported codecs or unusual channel layouts.
- Mobile-browser limitations.
- Loss of unsaved work if the editor does not provide a project file.
For an important episode, keep three copies:
- Original recording: never overwrite it.
- Edited master: retain a high-quality version for future revisions.
- Delivery export: keep the MP3 or other file sent to your host.
A repeatable browser editing checklist
- Duplicate the original recording.
- Import the working copy.
- Confirm the complete waveform and duration.
- Remove obvious mistakes and excessive pauses.
- Use careful selections or short fades to avoid clicks.
- Correct only the most noticeable level differences.
- Add the intro and outro if the arrangement remains simple.
- Preview the full episode.
- Export a high-quality master.
- Export the delivery MP3 according to the destination’s requirements.
- Play the exported file outside the editor.
- Archive the original, master, and delivery copy.
Final decision: should you use an audio editor online free?
Use an audio editor online free workflow when speed and simplicity matter more than deep project control. It is a practical choice for founders who need to clean up a mostly finished recording without installing a full desktop DAW.
Keep the scope narrow: cut mistakes, preserve natural pauses, make restrained level corrections, add simple opening and closing segments, and export carefully. Do not expect a browser editor to repair badly distorted audio, replace a dedicated loudness meter, or provide the same long-term control as a full multitrack workstation.
The strongest result is usually the least noticeable one: the speaker is clear, the transitions do not call attention to themselves, and the files are organized well enough to revise later.