Setting up podcast equipment is less about owning a large collection of gear and more about creating a reliable signal path. In a small office or home workspace, a simple setup can work well when every connection has a clear purpose and your microphone stays in a consistent position.
This guide walks through the first-recording process in order. It covers a USB microphone setup and a traditional XLR microphone with an audio interface. The goal is not to recommend one brand or expensive studio configuration. It is to help you understand what each component does, where it belongs, and what to check before you press record.
1. Plan the recording space before connecting anything
Begin with the place where you will actually sit and speak. A small office, bedroom, or spare corner is usually easier to manage than a large empty room because there are fewer long reflections and fewer surfaces to cross.
Choose the quietest practical position
- Place the desk away from a loud computer fan, window, HVAC vent, or frequently used doorway.
- Keep the microphone away from the edge of the desk if possible, where bumps and cable movement are more likely to reach the stand.
- Use a stable chair that does not squeak or roll while you speak.
- Keep your recording position repeatable. Mark the stand location with a small piece of removable tape if necessary.
Do not treat a bare desk, glass wall, or hard corner as an ideal microphone location. You do not need to redesign the room, but placing the microphone near softer furnishings—such as curtains, a bookcase, or an upholstered chair—can give the recording area a less reflective environment. Shure’s recording guidance emphasizes that microphone technique and placement affect both the captured voice and the amount of surrounding sound in the recording. Read Shure’s microphone placement guide for additional technical background.
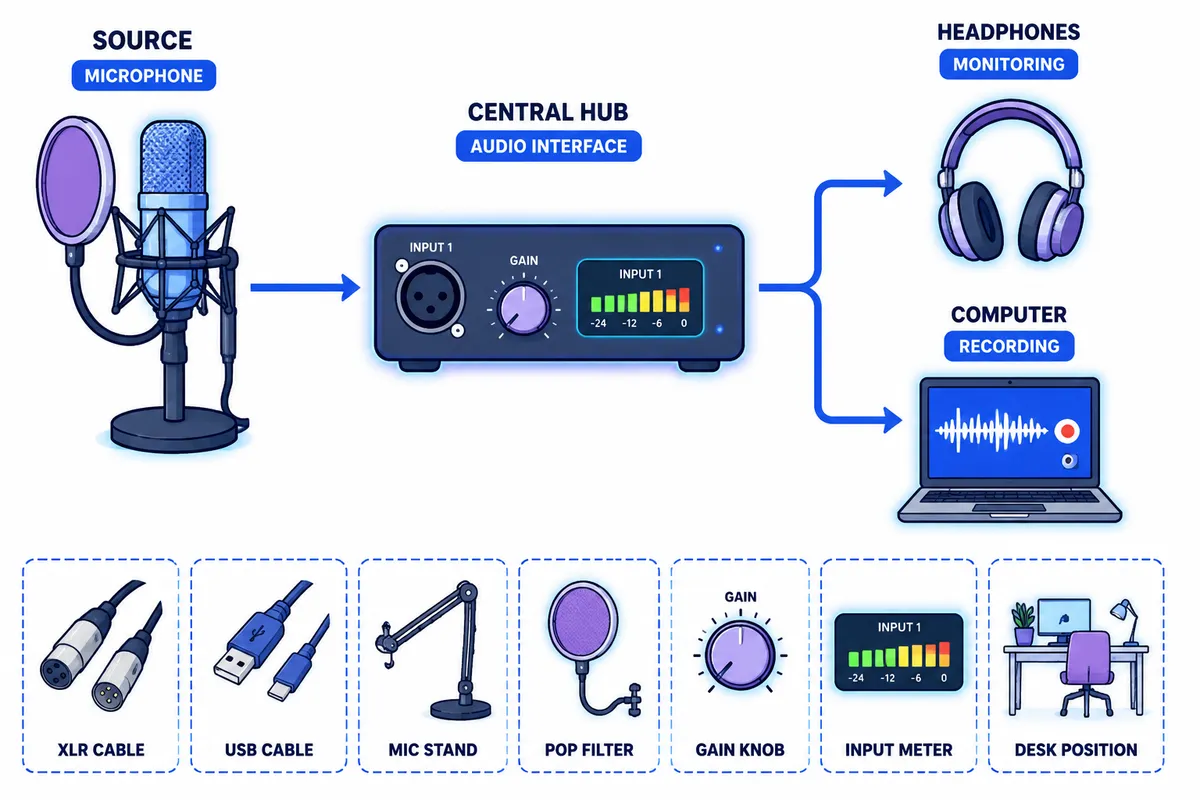
2. Identify each component and its role
Before plugging in cables, identify the parts of your setup. Most first-time podcast configurations use four core components:
- Microphone: Converts your voice into an audio signal.
- Audio interface: Used with an XLR microphone to provide a preamp, gain control, headphone output, and computer connection.
- Headphones: Let you monitor your voice and any remote guest or playback without sending sound back into the microphone.
- Computer and recording application: Stores the recording and provides controls for input, output, and monitoring.
You may also have a microphone stand or boom arm, a pop filter or foam windscreen, an XLR cable, a USB cable, and a power supply. These accessories are not interchangeable in every setup, so check which cable came with each device before forcing a connector.
USB microphone versus XLR microphone
A USB microphone contains its own digital conversion and connects directly to the computer. Its signal path is usually:
Voice → USB microphone → USB cable → computer → recording application
An XLR microphone sends an analog signal to an audio interface. The interface handles preamp gain and converts the signal for the computer:
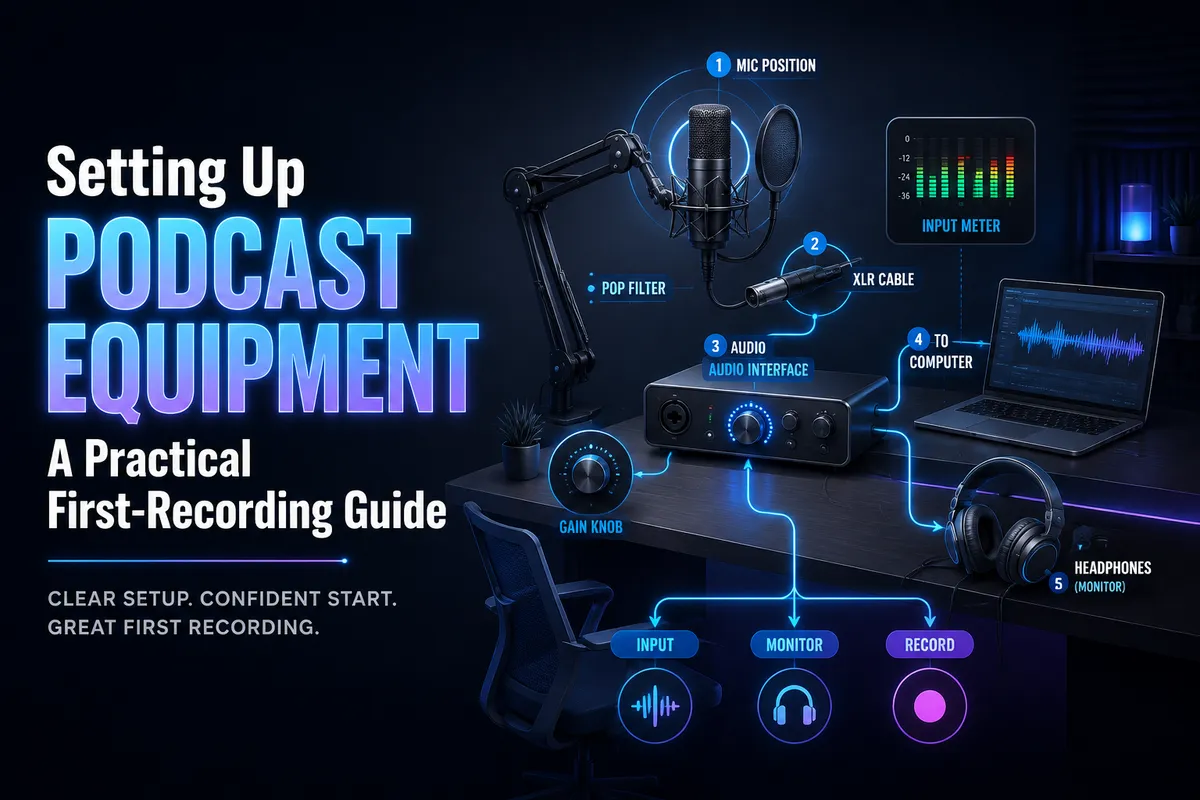
Voice → XLR microphone → audio interface → USB cable → computer → recording application
With an XLR setup, your headphones generally connect to the interface rather than directly to the computer. This makes the interface the central hub for the microphone and monitoring path.
3. Connect the microphone, interface, headphones, and computer
Connection order for an XLR setup
- Place the microphone in its stand or boom arm.
- Connect one end of the XLR cable to the microphone.
- Connect the other end to the interface’s microphone input.
- Connect wired headphones to the interface’s headphone output.
- Connect the interface to the computer with its USB cable.
- Connect the interface’s power supply if the model requires one.
- Open the recording application only after the interface is connected.
Many interfaces are bus-powered over USB, while others may require separate power. Follow the manual for your particular model rather than assuming that every interface behaves the same way. For example, Focusrite’s interface documentation identifies the headphone output, USB connection, input sockets, and direct-monitoring controls as separate parts of the signal path. See the Focusrite interface hardware guide for an example of how these controls are organized.
Connection order for a USB microphone
- Attach the microphone to its stand.
- Connect the microphone’s USB cable directly to the computer or to a powered hub recommended by the manufacturer.
- Plug wired headphones into the microphone if it has a headphone jack.
- Open the recording application and select the USB microphone as the input.
- Select the microphone’s headphone output as the monitoring output if your software offers that option.
If the USB microphone has no headphone output, you can monitor through the computer, but software monitoring may introduce a small delay. That delay can make speaking feel uncomfortable, especially when you are trying to hear your own voice in real time.
4. Position the microphone and stand
Microphone position has a larger effect on consistency than many beginners expect. Set the microphone before adjusting the input level, because moving closer or farther away changes the level reaching the input.
Use a repeatable speaking position
- Place the microphone approximately a hand’s width from your mouth as a starting point.
- Aim the front or active side of the microphone toward your mouth. Some microphones are side-address, while others are end-address.
- Keep the capsule slightly off to one side rather than directly in line with your breath if plosive sounds are a problem.
- Position the microphone at mouth height or just below it so you do not need to bend your neck.
- Keep the stand and boom arm outside the area where your hands regularly strike the desk.
A pop filter or windscreen can help reduce strong bursts of air from sounds such as “p” and “b.” It should not force you to sit too far away. The important point is to keep your mouth-to-microphone distance steady while recording.
For a two-person setup, use one microphone per speaker when possible. Each person should have a separate input and should sit at a similar distance from their microphone. Avoid placing two microphones directly beside each other if the speakers can instead angle slightly toward their own microphones.
5. Select the input and output devices
There are usually three places where audio devices can be selected: the operating system, the recording application, and the interface or microphone itself. The recording application is the most important place to check because it determines what gets recorded and where monitoring is sent.
On macOS
Open Apple menu → System Settings → Sound, then select the desired device under Input or Output. Apple documents these controls as the place to choose a connected microphone, interface, headphones, or speakers. Review Apple’s input-device instructions if your microphone does not appear in the list.
For an interface with several channels, macOS may show the interface as one device rather than listing each input separately. You select the specific channel later inside the recording application.
On Windows
Open Start → Settings → System → Sound. Under Input, choose the microphone or interface. Under Output, choose the interface or headphones you intend to use. Microsoft also provides a microphone test under the device’s input properties, which can confirm that Windows is receiving a signal before you troubleshoot the recording application. See Microsoft’s microphone test steps.
Inside the recording application
Set the application’s input device to your USB microphone or audio interface. Set the output device to the same interface when your headphones are connected there. If you are using a USB microphone with headphones connected to the computer, select the computer’s headphone output instead.
Do not assume that the operating system’s default device and the application’s device are synchronized. Confirm both before recording.
6. Set gain without clipping
Gain controls how strongly the microphone signal is amplified before it is recorded. Volume controls how loud you hear the signal later. They are not the same control.
A simple gain-setting workflow
- Set the interface or microphone gain low before speaking.
- Put on your headphones and sit in your normal recording position.
- Speak at the loudest level you expect to use during the episode, including an energetic introduction.
- Increase the gain gradually while watching the input meter.
- Stop increasing the gain if the meter reaches the clipping area or shows a clip warning.
- Leave enough headroom for an unexpected laugh, emphatic word, or change in distance.
The exact meter colors and numerical targets vary by application, interface, and recording format. The practical rule is consistent: your loudest normal speech should register clearly without reaching the maximum level. If the meter clips, lower the input gain and repeat the test. Turning down the headphone volume will not prevent a clipped recording because it changes what you hear, not the signal being recorded.
Set gain after the microphone is positioned. If you move closer, turn your head, or change the microphone angle later, repeat the check. A stable speaking distance is part of your gain strategy.
7. Test monitoring and latency
Monitoring means listening to the audio path while you record. It helps you notice a muted microphone, the wrong input, an unplugged cable, or a level problem before an entire episode is lost.
Direct monitoring
Many audio interfaces include direct monitoring. This routes the incoming microphone signal to the headphone output without sending it through the recording application first. Focusrite describes direct monitoring as a way to hear the input in real time rather than waiting for the software return signal. Read Focusrite’s explanation of direct monitoring.
If you hear both the direct signal and the software-monitored signal, your voice may sound doubled or delayed. In that case, use one monitoring path rather than both. The control may be labeled Direct Monitor, Input/Playback, Monitor Mix, or something similar.
Software monitoring
Software monitoring sends the input through the recording application before returning it to your headphones. It may be useful when you need to hear software processing or a remote session, but the delay depends on the computer, application, buffer settings, and connected equipment.
For a straightforward first recording, direct monitoring is often the simpler choice when your interface supports it. Keep the headphone level comfortable; headphones that are too loud can make you speak unnaturally or fatigue you during a longer session.
8. Record a short test before the episode
Do not make the first take the episode. Record 20 to 30 seconds that includes your normal introduction, a louder phrase, a pause, and a sentence spoken at the distance you plan to maintain.
Then check five things:
- Correct voice: Is the recording using the intended microphone rather than the computer’s built-in mic?
- Correct channel: If using an interface, is the selected input the one containing your microphone?
- Stable level: Does the meter remain active without clipping?
- Monitoring: Can you hear yourself and any playback through the intended headphones?
- Position: Does the recorded voice remain consistent when you speak normally?
Listen back to the test through the same headphones you will use during the session. If you change the microphone angle, distance, input, or monitoring device, record another short test.
9. Troubleshoot common setup mistakes
The recording application shows no signal
Check the physical connection first, then confirm the input device in the application. With an XLR setup, verify that the cable is connected to a microphone input rather than a line or instrument input. With a USB microphone, confirm that the device appears in the operating system’s input list and that microphone permission is enabled.
The wrong microphone is being recorded
Temporarily disconnect unused microphones, webcams, and headsets. Then select the intended input in the recording application and record another test. A device name such as “USB Audio Device” may not make it obvious which microphone is active, so speak while watching the input meter.
You hear nothing in the headphones
Check the headphone connection, headphone level knob, mute controls, and selected output device. If the headphones are connected to the interface, the application should normally send output to that interface. If they are connected to the computer, select the computer’s headphone output instead.
Your voice sounds doubled or delayed
You may have both direct monitoring and software monitoring enabled. Turn off one monitoring path. If the interface does not offer direct monitoring, reduce the application’s monitoring delay where possible or monitor only when necessary.
The level clips when you become more expressive
Lower the microphone gain, move slightly closer only if that position is comfortable and repeatable, and retest at your loudest expected speaking level. Do not fix input clipping by lowering the headphone volume.
The interface input does not seem to work
Check whether the microphone requires phantom power and whether your microphone’s specifications call for it. Enable phantom power only when appropriate for the microphone and follow the interface manufacturer’s instructions. Dynamic microphones and condenser microphones can have different power requirements.
10. Printable pre-recording checklist
Keep this short checklist beside your desk:
- Recording space is quiet and the chair is stable.
- Microphone stand is secure and in the marked position.
- Microphone is aimed at my mouth and the distance is consistent.
- USB or XLR cable is fully connected.
- Headphones are connected to the intended monitoring device.
- Correct input is selected in the operating system.
- Correct input and output are selected in the recording application.
- Phantom power is set correctly for the microphone, if required.
- Gain is set while speaking at normal and loud levels.
- Input meter is active but not clipping.
- Only one monitoring path is enabled.
- A short test recording has been made and played back.
- Episode file location and recording format are confirmed.
What should you do after the recording setup works?
Once the connection and monitoring process is repeatable, document it. Write down the microphone input, interface gain position, microphone distance, recording application settings, and file location. A simple setup note can save time before every future episode.
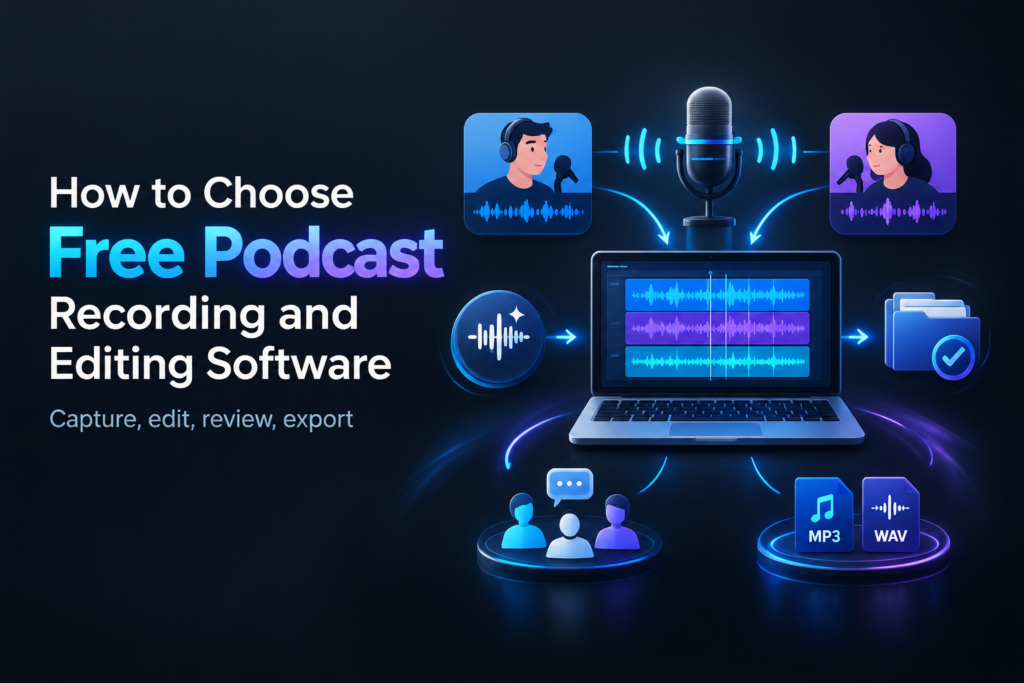
After recording, you can build a broader production process around the raw file. For example, Podtools’ guide to creating a podcast workflow with AI tools can help organize later production steps, while turning podcast episodes into blog posts covers repurposing ideas after the recording is complete.
If your setup is reliable but you still need to choose an editing environment, compare options in the guide to podcast editing software. The key is to separate the physical recording setup from later editing decisions: first make sure the microphone signal is reaching the intended track, then refine the production workflow.
The best first-recording setup is the one you can recreate without guesswork. Place the microphone consistently, follow the same connection order, select the devices deliberately, set gain using your real speaking voice, and always record a short test. Those habits make a small home workspace feel much more predictable.